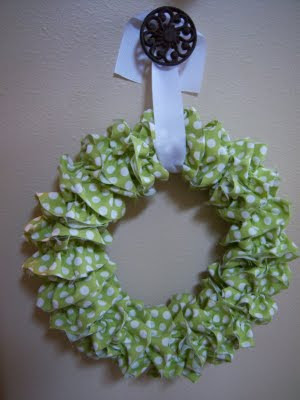
Cut your fabric into strips. I wanted larger ruffles, so I went with a wider width.

Stitch all of the strips together. I did this really fast, nothing fancy. And yes, this is my mother's sewing machine that she used when she was oh, so young.

I didn't count the number of strips, I just knew I needed a lot. You'll end up with one long strip.

Put your machine on the longest stitch possible and run your fabric through, down the center. Leave a good portion of thread at the beginning and at the end.

Now you ruffle. Lay it out flat on your floor. Starting at either end, grab on to ONE of the two threads. I used the bottom thread. Hold onto it and start to pull and ruffle.
This step takes the most time. You have to just inch away at it until you reach the end. You can make your ruffle really loose or very tight. I wanted mine somewhere in between.
I also like the look of frayed edges. As I ruffled the fabric, it frayed on it's own. If the worn look bothers you, you'll need to hem the edge before you start the ruffle process.

Start at the back of your wreath form and wrap. I hot glued the ruffle at various sections as I wrapped. Adjust the ruffle edges as you go. Trim up the long frayed edges once you're done.

Hang with ribbon.
Once it was up, I trimmed a few stray threads here and there. I also made sure that the wreath form wasn't showing anywhere by adjusting the ruffles.

Total time to complete-- 2 hours.
I got this wreath idea based on something I saw here.
Now it's your turn.


2 comments :
Running to my craft closet right now to see if i can make it NOW!! Love it! Thanks for sharing!!!!
Um I am LOVING this idea! A tip that I learned at work that is the bomb for this kind of thing, zig zag over dental floss and use that for your gathers...the dental floss won't break when you are making the gathers=no swearing while sewing. Try it!
Post a Comment